
anybody do any mods, besides the billet cage, to the front differential?
Category Archives: RZR XP 900
Torn and oval out A-arm mounts…???
Hey guys ok so I recently tore apart the front end of my 900 to only find more issues as I dug. I had some questions I was turned on to the racertech step washers by a fellow member and seems to be a great idea my question is how is everyone tig welding in the far back lower A-arm mount washer I don’t see anyway of welding all the way on the washer is only welding the first half ok and having the bolt hold in place??? Or has anyone had any experience with the full weld in gusset kits thanks in advance :ok:
Power Steering for RZR 900XP? Best aftermarket unit? UniSteer, EZ Steer or Other?
Hey guys. My buddy owns a 2011 900XP and it tired of fighting the steering wheel. He is ready to install a power steering unit. He has been looking at Uni-Steer for around $600 and EZ Steer also which runs about $750. Does anyone have these units? Opinions?
Are there better units out there? If so, what and how much?
Thanks.
sale on RZR900 accessories
We are offering some of our 2011-2014 RZR XP900 accessories at a discount to reduce inventory. You can also save 10% using the coupon code "rzr forums" when checking out. You must log in/register to use the coupon code.
Here are some of the specials and they may end at anytime.
RZR XP900 Rear Trailing Arm Guards (set)
Was $169.99
RZR XP900 Extreme Rear Bumper
Was $179.99
RZR XP900 Cab Back / Dust Stopper
was $179.99
Weller Racing tensioner install write up
I wanted to make a write up for the Weller Racing automatic chain tensioner install for the 900XP. I had a loud rattle the first second after start up if the RZR sat for a couple of days, indicating a weak factory cam chain tensioner. Every write up or video that I saw said that it takes less than an hour to do the entire job even with removing the valve cover. Also the Weller racing instructions were about 4 steps long, the first being “remove the valve cover” Turns out all the write ups and videos were on 1000 XP where the valve cover is right on top and the job can be done in a short amount of time. They open the hatch to find something like this (Borrowed from Justintoxicated’s video) —
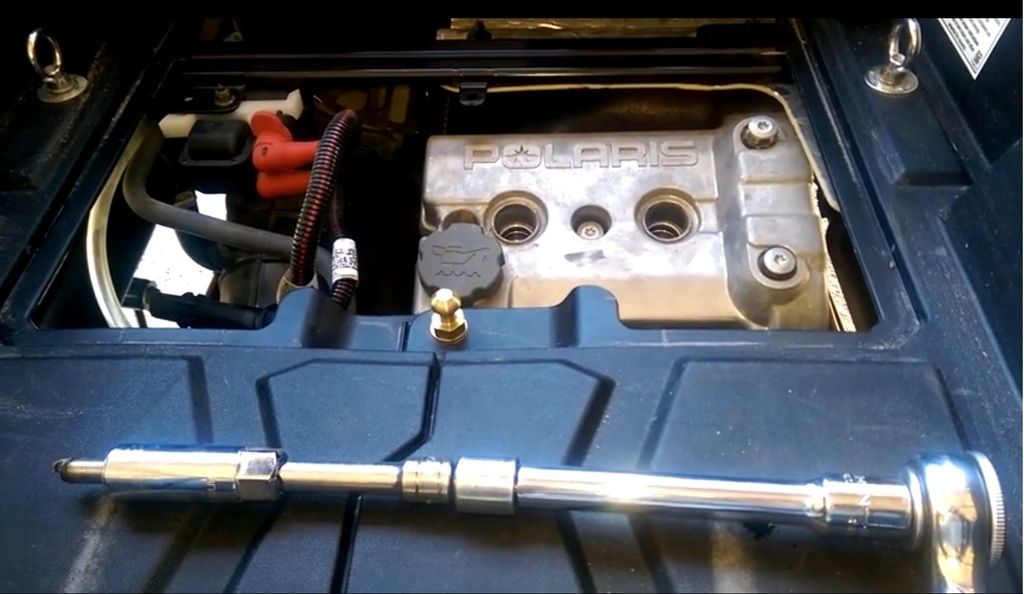
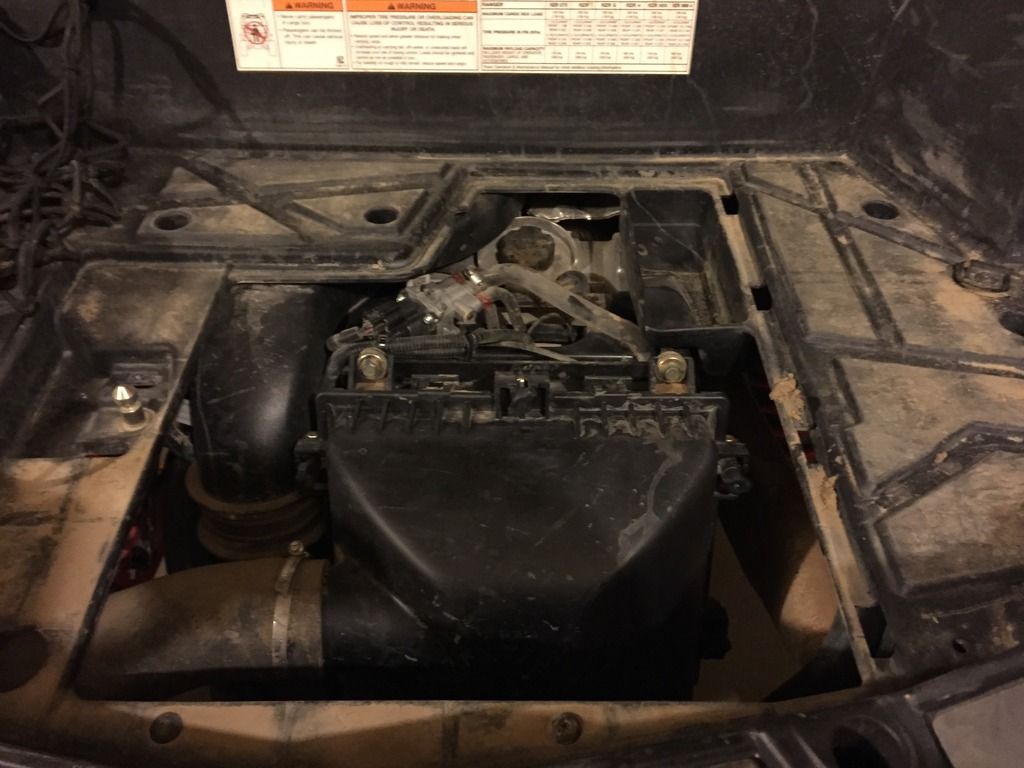
Us lucky 900XP owners open the hatch to find this-
This is actually a simple job but be prepared it did take me about 5 hours (did some cleaning so maybe less) to install the tensioner the RIGHT way in accordance with the Weller Racing installation manual. So here we go.
First off remove the rear fender flare panels. There are 7 T27 torx screws and one plastic push retainer holding each side on.
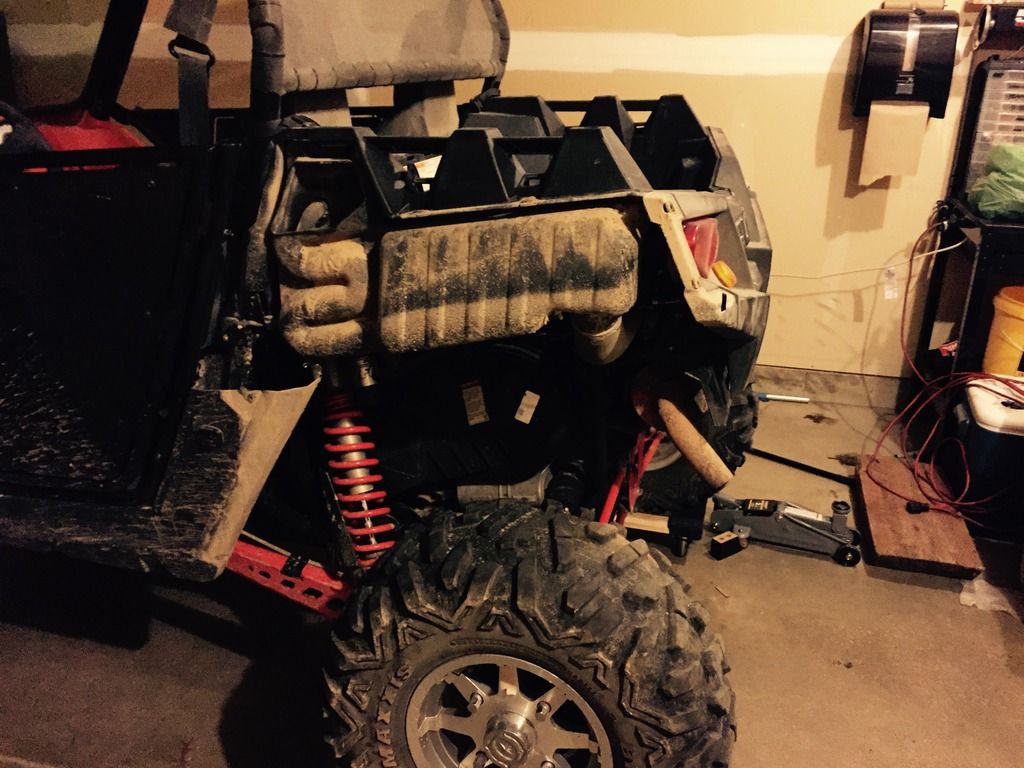
Next remove the rear panel, you can choose to remove the entire light bulb socket or you can unhook the socket from the light. My clips were too brittle and broke when I touched them so next time I would recommend just taking the entire bulb out and gently lay them aside. Mine had a gray plastic stand off in the middle where the right brake light wiring was anchored, keep an eye out for that.

Us lucky 900XP owners open the hatch to find this-

This is actually a simple job but be prepared it did take me about 5 hours (did some cleaning so maybe less) to install the tensioner the RIGHT way in accordance with the Weller Racing installation manual. So here we go.
First off remove the rear fender flare panels. There are 7 T27 torx screws and one plastic push retainer holding each side on.

Next remove the rear panel, you can choose to remove the entire light bulb socket or you can unhook the socket from the light. My clips were too brittle and broke when I touched them so next time I would recommend just taking the entire bulb out and gently lay them aside. Mine had a gray plastic stand off in the middle where the right brake light wiring was anchored, keep an eye out for that.

Take the bed off by removing the torx screws behind the seats and the anchors in the bed. It looks like the left side air intake box mounts to the bed behind the left tail light. My rig never had a screw installed there so I didnt have to worry about it. Lift up and remove.

There is a brace from left to right above the valve cover. You need to take this brace loose to make room for the valve cover to come off.
Remove the belt box exhaust that lays over the brace, it just sits up front under the belt box intake hose.


Next disconnect the air intake hose from the air filter box, then remove the left side 13mm bolts on the brace, and the two 10mm bolts holding the air filter box to the brace.

Remove the right side CVT intake by removing the hose clamp at the front of the belt box (mine was never tightened from factory so it was just laying there) and the two 13mm bolts holding on the brace

Make sure you clean these air hose connections and cover them, disposable gloves work great for this. Remove the 2 torx screws (T25 I think) holding the harness to the brace. Dont loose the clamp on the rear bolt because it easily slips out down the line and out of sight. Remove the plastic fastener from the brace holding the heat shield and flex the shield up and out of the way.
The clutch cover will need to come off too so you can rotate the crank when you need to find TDC.
At this time the brace should be moveable. I pulled the right side of the brace up and back over the bed frame to give the valve cover some room. I recommend using a vacuume and compressed air to clean all the dirt out you can. Take extra care of the fuel line that runs over the cover so it does not dump dirt on the camshafts when the cover breaks free.


Remove the spark plugs and wires and the 4 Torx bolts holding it on. Keep an eye out for the rubber grommets that are under the bolts. Pull up on the valve cover and it should come free and out of the way.


This is where the instructions are straight forward, rotate the lobes out, remove tensioner, install tensioner, verify cam timing marks, blah blah blah. I have the new style of tensioner where weller builds them from start to finish instead of modifying and welding the factory one. The factory (left) has a much bigger hole in the end. Mine was completely shot and i could depress it all the way with just my pinky.

For fun I boroscoped the cylinders to see if there was anything going on in there, just some carbon build up but no pics unfortunately. I have 1300 miles on mine and could still see the cross hatches in the bores. During reassemble I did a little cleaning, just one dusty ride a few weeks ago made a mess of it all.

All torn apart

At this point I connected all the important pieces needed for the first start up. If there are any oil leaks caused by the job it would be a good time to find out about them before it all goes back together. The first second of start up I had the nasty rattle (not as bad as before) but I was expecting this until the new tensioner was filled with oil. I let mine Idle for about 10 minutes to warm up, never had a leak. I was nervous about the heavy clacking sound, turns out it was my clutches and never knew how loud they were until I ran it without the cover. All the sound went away and was normal when everything was reassembled.

After a couple of starts. Trying to figure out the clacking and it would smooth out when revved up, found out its just loud clutches. Took it for a drive to the DIY car wash to clean it up and ran great.
Hope this helps give a little guidance to those of us that needed to replace the tensioner. Another reason to envy those XP1ks
Weller Racing tensioner install write up
I wanted to make a write up for the Weller Racing automatic chain tensioner install for the 900XP. I had a loud rattle the first second after start up if the RZR sat for a couple of days, indicating a weak factory cam chain tensioner. Every write up or video that I saw said that it takes less than an hour to do the entire job even with removing the valve cover. Also the Weller racing instructions were about 4 steps long, the first being “remove the valve cover” Turns out all the write ups and videos were on 1000 XP where the valve cover is right on top and the job can be done in a short amount of time. They open the hatch to find something like this (Borrowed from Justintoxicated’s video) —
Us lucky 900XP owners open the hatch to find this-
This is actually a simple job but be prepared it did take me about 5 hours (did some cleaning so maybe less) to install the tensioner the RIGHT way in accordance with the Weller Racing installation manual. So here we go.
First off remove the rear fender flare panels. There are 7 T27 torx screws and one plastic push retainer holding each side on.
Next remove the rear panel, you can choose to remove the entire light bulb socket or you can unhook the socket from the light. My clips were too brittle and broke when I touched them so next time I would recommend just taking the entire bulb out and gently lay them aside. Mine had a gray plastic stand off in the middle where the right brake light wiring was anchored, keep an eye out for that.
Take the bed off by removing the torx screws behind the seats and the anchors in the bed. It looks like the left side air intake box mounts to the bed behind the left tail light. My rig never had a screw installed there so I didnt have to worry about it. Lift up and remove.
There is a brace from left to right above the valve cover. You need to take this brace loose to make room for the valve cover to come off.
Remove the belt box exhaust that lays over the brace, it just sits up front under the belt box intake hose.
Next disconnect the air intake hose from the air filter box, then remove the left side 13mm bolts on the brace, and the two 10mm bolts holding the air filter box to the brace.
Remove the right side CVT intake by removing the hose clamp at the front of the belt box (mine was never tightened from factory so it was just laying there) and the two 13mm bolts holding on the brace
Make sure you clean these air hose connections and cover them, disposable gloves work great for this. Remove the 2 torx screws (T25 I think) holding the harness to the brace. Dont loose the clamp on the rear bolt because it easily slips out down the line and out of sight. Remove the plastic fastener from the brace holding the heat shield and flex the shield up and out of the way.
The clutch cover will need to come off too so you can rotate the crank when you need to find TDC.
At this time the brace should be moveable. I pulled the right side of the brace up and back over the bed frame to give the valve cover some room. I recommend using a vacuume and compressed air to clean all the dirt out you can. Take extra care of the fuel line that runs over the cover so it does not dump dirt on the camshafts when the cover breaks free.
Remove the spark plugs and wires and the 4 Torx bolts holding it on. Keep an eye out for the rubber grommets that are under the bolts. Pull up on the valve cover and it should come free and out of the way.
This is where the instructions are straight forward, rotate the lobes out, remove tensioner, install tensioner, verify cam timing marks, blah blah blah. I have the new style of tensioner where weller builds them from start to finish instead of modifying and welding the factory one. The factory (left) has a much bigger hole in the end. Mine was completely shot and i could depress it all the way with just my pinky.
For fun I boroscoped the cylinders to see if there was anything going on in there, just some carbon build up but no pics unfortunately. I have 1300 miles on mine and could still see the cross hatches in the bores. During reassemble I did a little cleaning, just one dusty ride a few weeks ago made a mess of it all.
All torn apart
At this point I connected all the important pieces needed for the first start up. If there are any oil leaks caused by the job it would be a good time to find out about them before it all goes back together. The first second of start up I had the nasty rattle (not as bad as before) but I was expecting this until the new tensioner was filled with oil. I let mine Idle for about 10 minutes to warm up, never had a leak. I was nervous about the heavy clacking sound, turns out it was my clutches and never knew how loud they were until I ran it without the cover. All the sound went away and was normal when everything was reassembled.
After a couple of starts. Trying to figure out the clacking and it would smooth out when revved up, found out its just loud clutches. Took it for a drive to the DIY car wash to clean it up and ran great.
Hope this helps give a little guidance to those of us that needed to replace the tensioner. Another reason to envy those XP1ks
bent frame ??
I clipped a rock out in Moab, knocked the air out of the tire & dinged up the rim pretty good on the right front. The right wheel was about 2" farther back than the left. The upper A arm, bushings, bolt & rod were tweaked so I replaced all those. The lower A arm is fine, but I replaced all the bolts & bushing in it. Everything fit together just fine. Now the wheel is 1" back. I have measured everything I can, there is no indication the frame is bent. NO crimps, dings, dents, anywhere in the frame. the A arm mounts are not bent. So I measured the wheelbase center to center of the wheels. right side, the side I hit, is 81 inches, the left side is 82 inches. Polaris lists the wheelbase as 81 !! it is like the entire front subframe is 1" longer on the left than the right. Could it be twisted 1 inch with no marks anywhere on the frame, or was it just built this way ?
Xp900 code 102
My bike is throwing a 102 code tmap voltage. Is this sensor part of the tps? Is it replaceable or so you have to buy the throttle body? Is it worth trying to clean it? Bikes a 12 900xp
Xp900 code 102
My bike is throwing a 102 code tmap voltage. Is this sensor part of the tps? Is it replaceable or so you have to buy the throttle body? Is it worth trying to clean it? Bikes a 12 900xp
Pro armor doors
I just picked up a 2011 Rzr xp 900. Taking some parts off my 2009 Rzr and the pro armor doors won’t bolt up. They seem to be too long by about 1-1 1/2" to long. Pro armors website shows they should fit. Anyone have experience with this? Thanks