
I have a 02 grizzly 660 I replaced the water pump with a new 1 and when I try to fill the radiator with coolant it immediately starts leaking out of the over flow tube on the water pump not the weep hole. If I plug the overflow line there it starts to come out by the thermostat overflow. It does this with the bike on or off cold or hot. The top end was recently rebuilt also. Any suggestions? Thanks in advance.
Category Archives: Grizzly Engine & Transmission
Wet clutch install
What is the proper way to retorque the wet clutch?
Start engine without CVT belt?
Hey guys, just wondering if its okay to start the engine and let it warm up without the belt attached – I don’t plan to rev it much, just start it up while in Neutral.
My belt wont come in until next week and I want to change the oil.
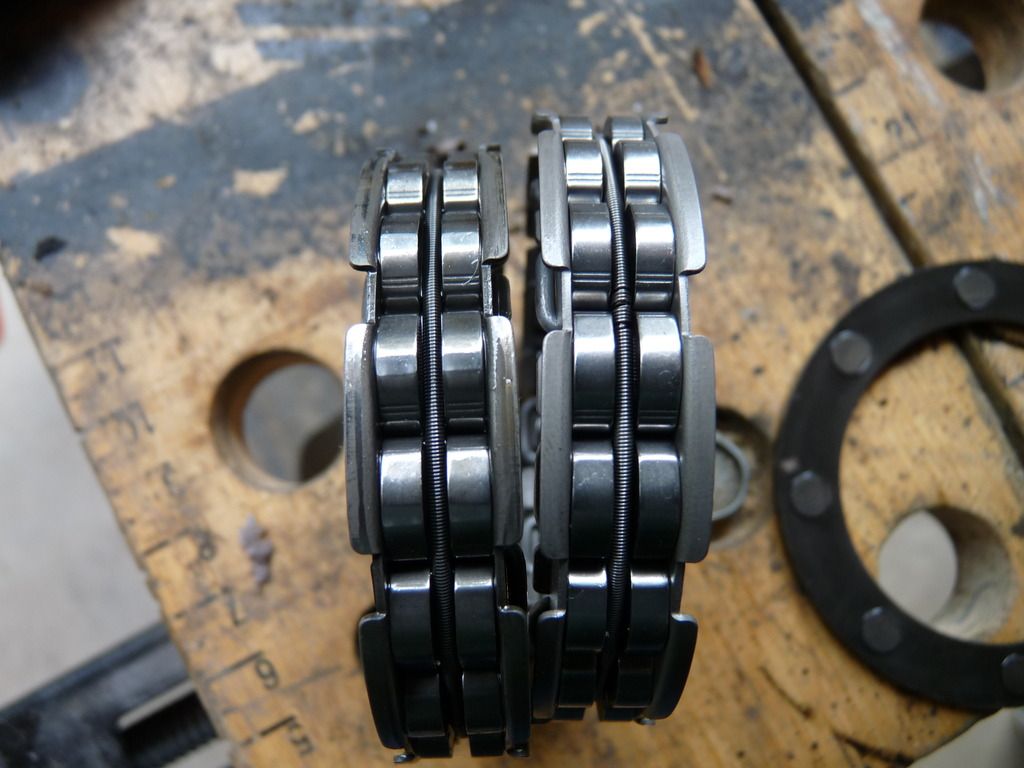
2013 One Way Bearing
Just changed my OW as it was skipping a little.
Starting in 2013 Yamaha added the ring seal to the clutch drum one way bearing assembly.
Starting in 2013 Yamaha added the ring seal to the clutch drum one way bearing assembly.
Here is a few pictures of the correct installation of the OW.
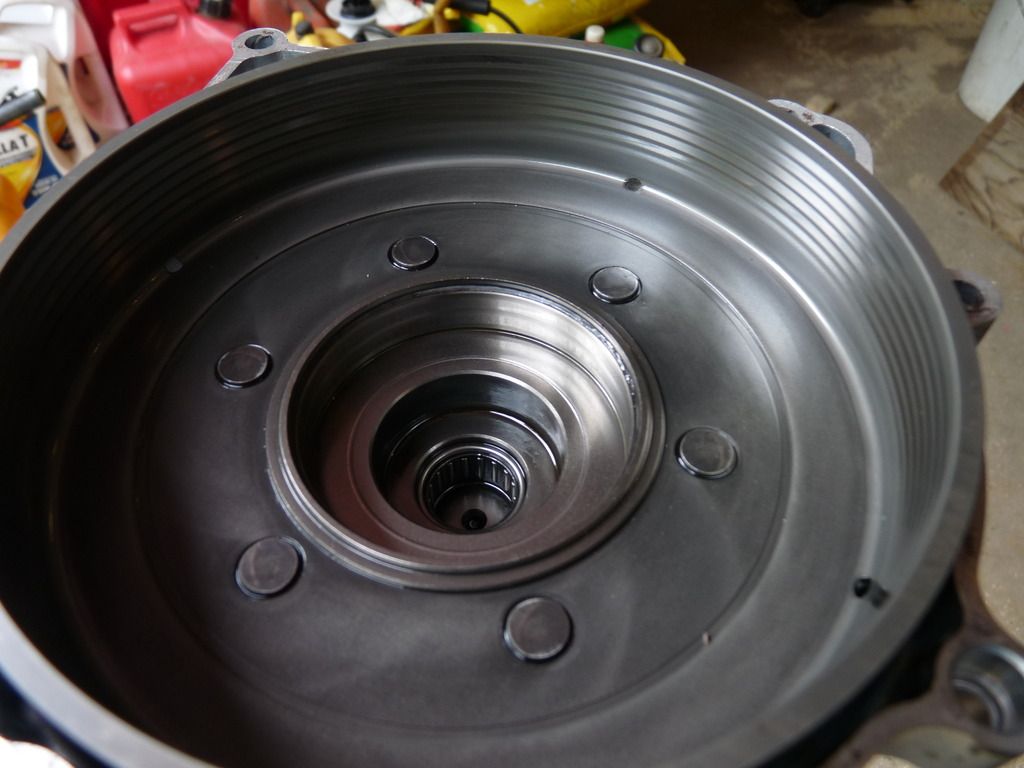
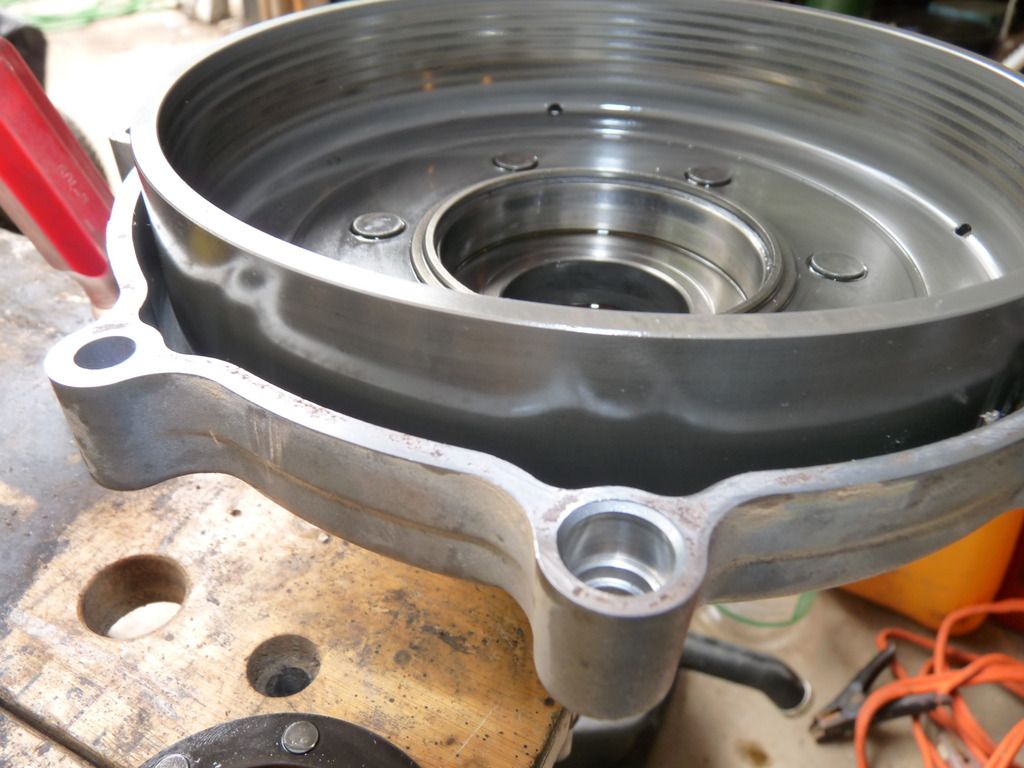
Drum before installing the OW and seal
(drum looks nice after 14000 miles)
If you look close you can see chatter marks on the drum race from the OW grabbing. They’re on the WC race also.
I shot these after installing the new OW and seal. Showing the old OW for clarification.
The OW has to be installed into the drum with the green dot or arrow facing away from you the the seal is tapped in.
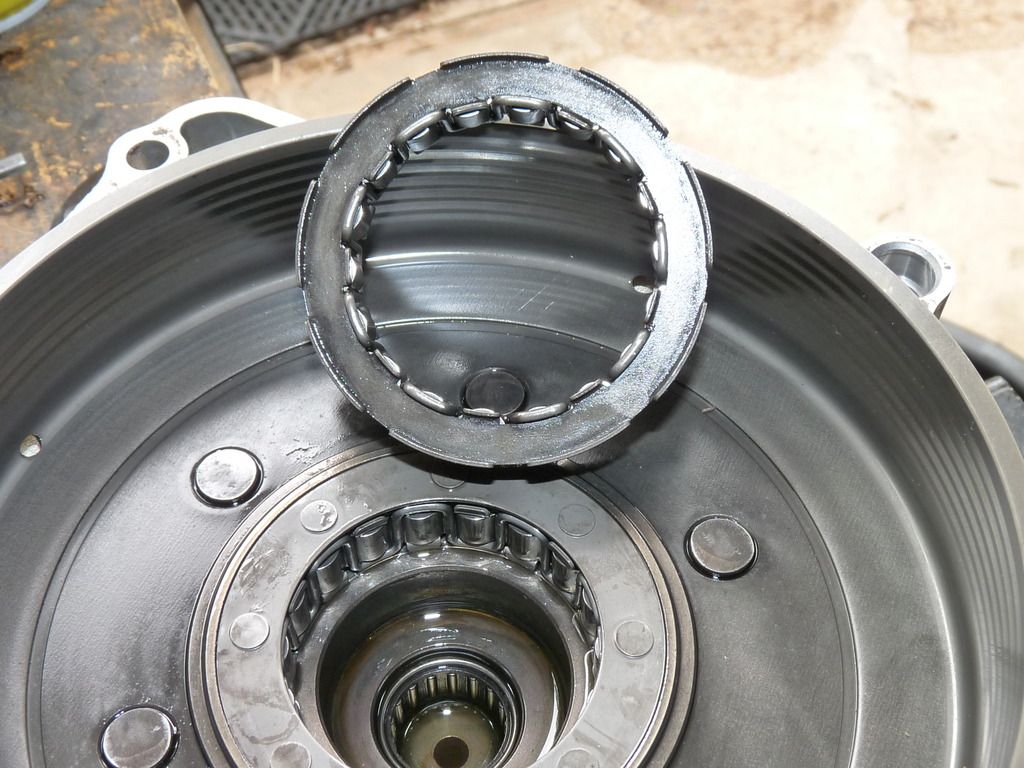
Wrong Way if you can see the green dot.
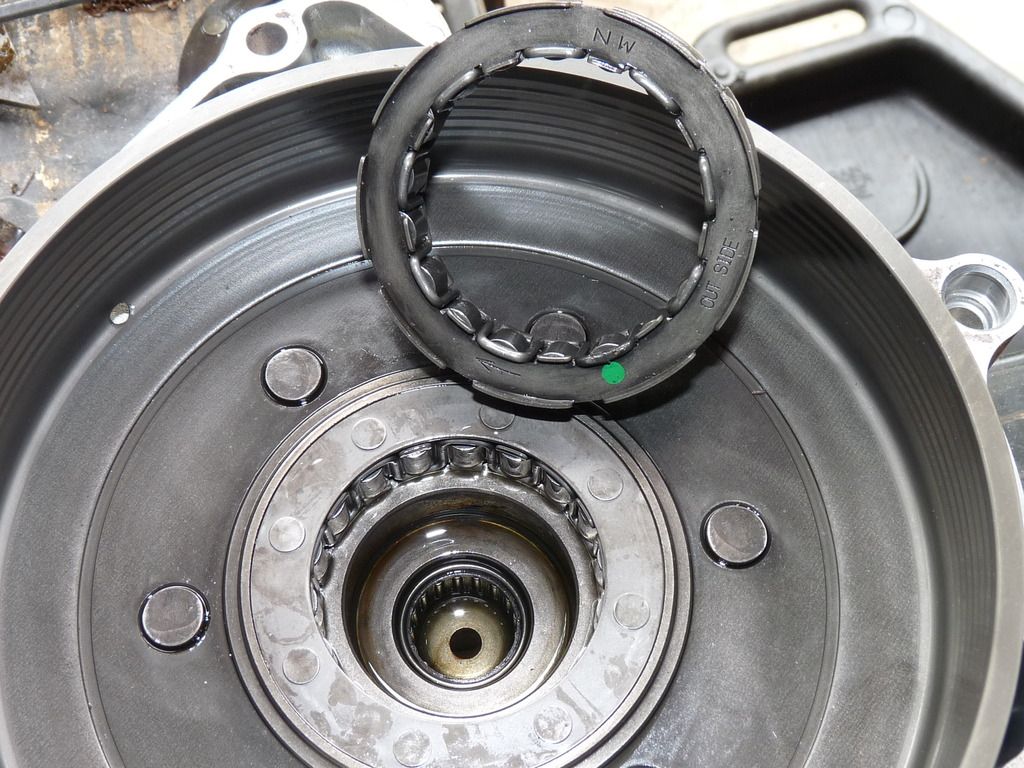
Old OW on left new on right, see the flat spots.(old ring seal layingin background)
:getrdone:
2013 One Way Bearing
Just changed my OW as it was skipping a little.
Starting in 2013 Yamaha added the ring seal to the clutch drum one way bearing assembly.
Starting in 2013 Yamaha added the ring seal to the clutch drum one way bearing assembly.
Here is a few pictures of the correct installation of the OW.
Drum before installing the OW and seal
(drum looks nice after 14000 miles)
If you look close you can see chatter marks on the drum race from the OW grabbing. They’re on the WC race also.
I shot these after installing the new OW and seal. Showing the old OW for clarification.
The OW has to be installed into the drum with the green dot or arrow facing away from you the the seal is tapped in.
Wrong Way if you can see the green dot.
Old OW on left new on right, see the flat spots.(old ring seal layingin background)
:getrdone:
Instructions for Changing Coolant on a Grizzly 700/550
This information is something I just typed up per the Yamaha User Manual for 07/08 Grizzly 700.
Quote:
|
Originally Posted by Yamaha Service Manual
1. Place the ATV on a level surface.
2. Remove panels D and F. (the top engine and left side engine panels). 3. Place a container under the engine, and then remove the coolant drain bolt (1).
4. Remove the top panels over the battery to expose the radiator cap. Tightening torque: Coolant drain bolt: 10 NM (1.0 m kgf, 7.2 ft lbf) 10. Connect the coolant reservoir hose. Antifreeze/water mixture ratio: 1:1 Coolant quantity: 13. Loosen the water pump air bleed bolt (1), without removing it, to allow all the air to escape from the air bleed bolt hole.
14. When coolant begins to flow out of the bolt hole, tighten the water pump air bleed bolt to the specified torque. Tightening torque: Water pump air bleed bolt: 10Nm (1.0 m kgf, 7.2 ft lbf) 15. Remove the right side engine plastic
18. When coolant begins to flow out of the bolt hole, tighten the cylinder head air bleed bolt to the specified torque. Tightening torque: Cylinder head air bleed bolt: 10Nm (1.0 m kgf, 7.2 ft lbf) 19. Start the engine and let it idle for ten minutes. |
Smell, maybe nothing
Hey all,
So for the 1st time ever, I had a burned rubber type of smell while riding yesterday. It was only like 2 or 3 times, in 5 hours, for like 30 seconds. I thought I was slipping my belt. I never really lost acceleration, and when I hit the throttle off/on off/on, it seemed responsive.
So I was going 30mph – 40mph, dirt road, not technical in hi range. I was not hammering it really at all. I weight like 180, dog is like 80, then front ogio with stuff in it, not much. Maybe at that speed in hi range, with upwards of 275 – 300lbs is too much for my 550? no way right?
I’m stock setup in my clutch.
So I got home, pulled CVT cover, smelled nothing, belt looks new, no debris and clean in there outside of a bit of dust. I did not dig into the wet clutch. I then noticed my front right big horn OG had some bad wearing issues going on, so I am going to pull that off and see if something is in the caliper.
So now wondering if alignment, maybe I should have dug into wet clutch, I don’t know.
I’m at 6,000 miles, never serviced anything, just change my oil.
Low End Power
I was looking for some recommendations for more power out of my 700. I don’t really care too much about top end, but would love some more low end power. Honestly, I would love to be able to wheelie easier. With the stock tires and rims, I could stand it up if I threw all my weight to the back as I gunned it. I added some 26" Zillas on 14" ITP SS212s and I can’t stand it up to save my life!
I added 1.5 mm shims this past weekend to see if that would help. I did notice a little difference in the take off, but still not enough to stand it up. Are there any cheap or easy mods to help with this? Or does anybody have any suggestions on good performance upgrades that don’t require actually breaking into the engine (like big bore kits, etc)? Thanks in advance for any help. :gcrules: