
So I picked up this 2004 CRF450r for 700 bucks. Its locked up, something in the top end.
Category Archives: Builds, Projects & DIY
Got a new project!!
So I picked up this 2004 CRF450r for 700 bucks. Its locked up, something in the top end. Needs a new front tire and levers. Should be a good project.
400ex question.
I’ll try to make this short and simple.
Pick up a 04 400ex off a trade.
Motor was off frame but completely assembled and "ready to go" put it on frame and go…. Blah blah… I clean quid up and lout new bearing a in it and all .
Put the motor on the frame and start it for the first time."after a few try’s"
When I finally got it leveled out and idling good . I noticed the "knock/tick"
My first thought was Timing chain or valves. But the boy out a new timing chain on this . Plus I adjusted valves and check chain afterwards.
Well I ride it anyways ( I know.. Stupid).
Probably didn’t ride t for put about 40 minutes all together the motor pecking the whole time.
I take it home and it’s smoking extremely extremely bad so I shut it off and tear it down.
And the piston and cylinder is scratched all up the side.
2 weeks and a lot of money later in were I am now new 416 11:1 piston , he at duty timing chain . And awaiting money for cylinder bore.
My question for you all is what do ou think cause this? Wore out piston? Bad wrist pin?
I ask because it was doubt this a first start up , guy swears that it wasn’t doing that at all when he tore t down.
He tore it down to put a new timing chain on it.
Crank has no up and down play.
I basically want your opinions just to compare with my owns .
I also noticed the wrist pin somehow seems a small amount to short for the piston it has play in between the wrist pins. Side to side
And piston is scratched on one side so is cylinder and scratches are below the rings on the piston
texas size snowplow
[img=http://s8.postimg.org/9pzepyc2p/snow_plow_2.jpg]
[img=http://s10.postimg.org/omybkxgr9/snow_plow.jpg]
6 ft x 34 inch high. am not going to lift with the quad. I,m going to have a cable that will drop a skid wheel that will raise the plow when I back up.
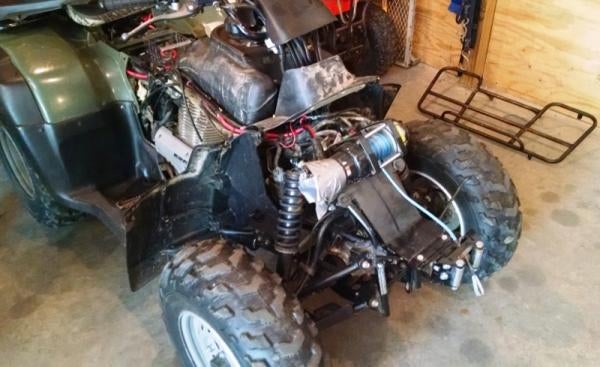
custom rancher 350 bumper build
So my daughter was "teaching" her friend to ride. Then she parks the wheeler and goes in the house as if nothing happened. I go out to the barn to find it neatly parked in its spot, but something doesn’t look right. Uppon closer inspection, the bumper was shoved into the plastic, bent and cracked. The upper rack is ripped out of the fender mounts and plastic cracked. The left mounting leg of the rack broke off. :icon_cussing:
So I found a great deal on a straight (all bars and mounts not bent) used front rack on ebay for $60 and decided to build the bumper.
Drew out the plans and went to my local steel supply shop and bought 18 feet of 1" medium duty square tube for $24. I have never attempted to build something like this before. This is also the first use of my mig welder (recent anniversary gift).
Here are pics of the process so far…
First I need to modify the winch plate mount. I will integrate a new winch hawse into the new bumper.


Bike to bike communications using old school CB radios
there are 2 families that ride together and we usually have 2 adult vehicles and 3-4 kid vehicles. bike-bike communication was important to me for coaching and teaching the kids to ride. Once you have it, it is tough not to have it.
At first we used the traditional 2 way radios, Midland and Cobra. The earpiece was uncomfortable in the helmets, but it worked. So I invested in helmet headsets for those radios. Also invested in a UHF/VHF radio for the side by side so driver didn’t have to wear earpiece, and so the passenger could hear also.
everything works great for a while. unless you spend the money on the Rugged systems, wires will break. I have hear good things about the Rugged systems, just too costly for me.
So I already use CB antennas as flag poles and LED whip sticks, so I thought, what the heck?
the kids are at the point where they really don’t need to respond unless they are stuck, or if they do, they can stop to talk using the hand held mic.
How did I install them, you might ask? built a box on the front rack.
neighborhood testing shows promise. biggest problem is being close together and having volume up too high, then you get feedback.
My 11 year old son helped out a lot. Also being a wood shop teacher I own a CNC machine, so we engraved a logo in the top. We were looking for the Recon logo, but came across this one instead and since the recon is white, it fits well.
Basic questions for DIY snow blade
Getting close to completing my DIY conversion of a old Sears garden tractor blade to a front mount ATV snow blade. Have a few questions I hope someone can help me out with.
1) What angle should I set the blade to with respect to the ground. Have the ability to adjust and want to get right.
2) Blade has shoes/feet to keep blade from going to low. I am plowing an asphalt driveway. How should these feet be set?
Will post some pictures when I am done.
Engine serial number
hello,I’m trying to find out what year make etc,from an engine that is separate from a quad,,the number is,,,TEO7E-5037569. Any help with this would be great,,I don’t want to buy the engine if I can’t use it on my quad
DIY Front Basket
Here’s a cheap way to get a front basket on your ATV. I know it looks pretty hoakey, but it works really well. I use it all the time for carrying tools, gloves, hunting gear etc.
The basket is a plastic tub that is available at Wal-Mart for $8 or $9. I first attached a piece of OSB to the rack using J-bolts. Then I screwed the tub to the OSB using wood screws and washers. The tub even comes with a cover if you want to keep the contents dry. I drilled a drain hole through the tub and OSB on my first tub, and that worked well, but I found that since I keep my ATV inside all the time, the drain hole wasn’t necessary in my case. When I broke my first tub by rubbing up against a tree, I didn’t bother drilling a drain hole in my replacement tub. Since the tubs are so cheap, it is not a big deal if you break one.
-Ken