2012 outlander 800 XT. Tore the front right outer boot over the weekend. Going to try replacing it tonight. I’ve watched all the you tube videos and it looks like they all pull the axle completely out of the differential. My question is, do I need to pull the axle out for the outer boot? Or can leave the axle in the differential? Thanks in advance.
Having an issue with my 800. After about the first 5 min of a ride, i see the speedo jumping and dropping, just going crazy, then followed by sputtering for a bit. Once it is all hot then these isues seem to go away. What can be the cause of this. I did tighten the battery terrminals which were a bit lose but no cure.
Anyone try one of these pumps to put the gear oil in their diffs?? I picked this one up off e bay for 9 bucks with free shipping. I just figured i would ask and see if anyone has thought to try one of these before.
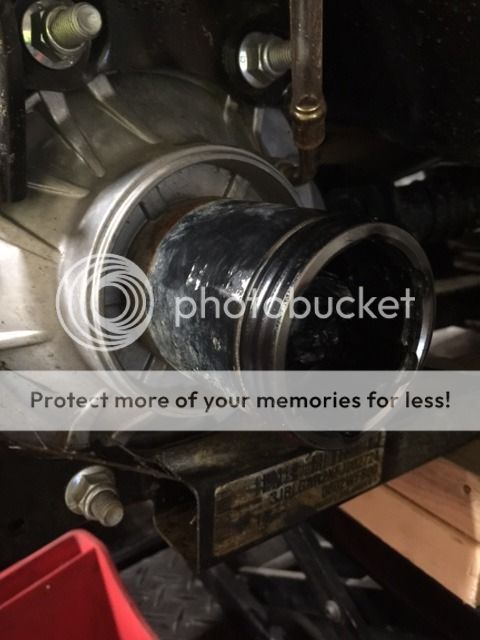
Removing an inner CV joint can be difficult but here is how I did it today and it was easy.
I used a slide hammer with an angled end, I took up the extra space with a 1/2" extension, put pressure on the extension by pulling the slide hammer in the direction of the extension and use the slide hammer to remove the joint.
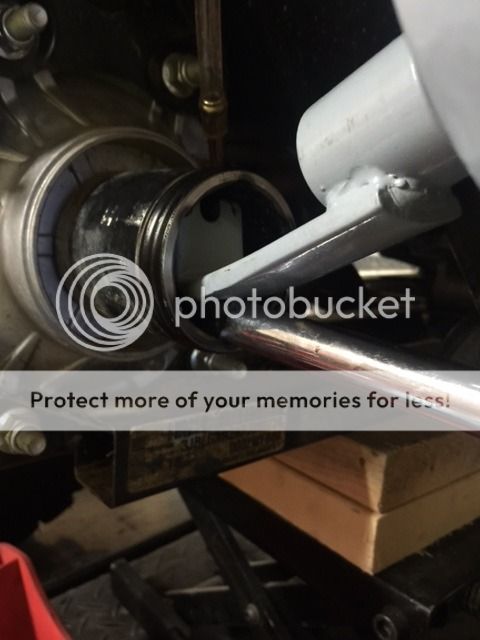
Just installing a couple of 10 watt LED’s in my fairing and I managed to get my hands on the install instructions for the BRP accessory LED’s that are the same wattage and size. Turns out the accessory LED’s would just connect through a switch to a pre-wired accessory connector already integrated in my bike from the factory, meaning they have already sized everything for this extra 20 watt load. Along with the accessory connector there is also a blue wire that is taped to it, that also gets connected. The harness that ships with the Canam accessory lights has a 3 position switch that lets you turn the lights on whenever you want independent of the stock headlights in position one. In the second position the lights operate in conjunction with the high beams. The third position the lights are always off. I’m only interested in having them work in conjunction with my high beams so if I had the wiring schematic I could figure this out without having to do trial and error. If I can get this figured out I will share my complete install. Total cost will be around $40 cdn for the setup.
Anyone know how to get in touch with quad shop customs or someone who sells his primary’s? I have a friend who has been trying to order one for a month but can’t reach anyone there.
I just wanted to help set at ease the minds of anybody who is considering mounting a winch on their outlander. I was a little suspicious of the ‘winch ready’ mounting that the dealer advertised and they were not about to throw in a winch on my new ATV so i decided to DIY it up with a KFI Stealth 3500 lbs winch from amazon. The dealer didnt seem to know that much about the actual winch installation and thats why I am posting this.
The winches solenoid mount is directly under the right (when on the vehicle) fender wheel well and consists of a 3 point threaded mount with power and ground wires already to plug in.
The holes are threaded for a warn provantage winch which uses smaller bolts than my KFI so i used an appropriate sized drill to open the holes up for its bolts, lock washer and nuts.
If you are unable to use the threads and have to drill the holes you will want to remove the relays temporarily that are directly behind the solenoid mount. They are secured with one bolt (14mm?) and you can just push them asside.
There is a keyed accessory wire underneath the digital display that has a white end on it and also has a grounding wire. You can simply splice into the hot wire with a wire splice (the KFI winches come with 2 splicers or you can simply strip and twist on and tape over the power.
The winch wires are very straight forward and will require you to take off the right (when on the vehicle) plastic panels above the footwell. They use several plastic push pins under the same side wheel wells and a couple under the seat.
You can use a tool such as this to remove the pins although i used a flat head screw driver:
If the pins are damaged they are available at any autoshop or your big box home improvement stores (and of course amazon)
One thing to note is that if you have the KFI winches the red and black cables are supposed to go from the solenoid to the battery but are MUCH too short and the blue and yellow cables are MUCH too long to go to the solenoid and you can swap them out all the same. Yellow and blue from the winch to the solenoid and red and black to the battery from the solenoid. The kfi manual has it the other way around.
The hand mount bolts right to the handle bar but you may need to move the brake lever to fit the mount and the wires will follow the brake line down into the frame and out the same wheel well
Many of you are probably thinking well duh i knew that already! But my intent is to reassure those less familiar with such applications that they should not be afraid to save the money on a DIY winch install.